Showing posts with label aperture assignment. Show all posts

Wednesday, March 5, 2014

Exposure: Aperture/Depth of Field


What is Aperture?

Simply put, aperture is a hole within a lens, through which light travels into the camera body. It is easier to understand the concept if you just think about our eyes. Every camera that we know of today is designed like human eyes. The cornea in our eyes is like the front element of a lens – it gathers all external light, then bends it and passes it to the iris. Depending on the amount of light, the iris can either expand or shrink, controlling the size of the pupil, which is a hole that lets the light pass further into the eye. The pupil is essentially what we refer to as aperture in photography. The amount of light that enters the retina (which works just like the camera sensor), is limited to the size of the pupil – the larger the pupil, the more light enters the retina.


So, the easiest way to remember aperture, is by associating it with your pupil. Large pupil size equals large aperture, while small pupil size equals small aperture.  (source)


Brown Eye Close Up
image courtesy boogy man

Size of Aperture – Large vs Small Aperture

In photography, aperture is expressed in f-numbers (for example f/5.6). These f-numbers that are known as “f-stops” are a way of describing the size of the aperture, or how open or closed the aperture is. A smaller f-stop means a larger aperture, while a larger f-stop means a smaller aperture. Most people find this awkward, since we are used to having larger numbers represent larger values, but not in this case. For example, f/1.4 is larger than f/2.0 and much larger than f/8.0.


Take a look at this chart (image courtesy of Wikipedia):
F-numbers
The size of the circle represents the size of the lens aperture – the larger the f-number, the smaller the aperture.

What is Depth of Field?

One important thing to remember here, the size of the aperture has a direct impact on the depth of field, which is the area of the image that appears sharp. A large f-number such as f/32, (which means a smaller aperture) will bring all foreground and background objects in focus, while a small f-number such as f/1.4 will isolate the foreground from the background by making the foreground objects sharp and the background blurry. (source)


TO DO:


Click These links: 
1. PhotoAxe-Depth of Field  
2. PhotoAxe-Aperture  
3.  ShortCourses-Aperture-- Click on ALL red animation buttons on the left side of page!! 
4. http://ruleofthirdsphotography.com/interactive-aperture/
5. Exposure Controls
6.Choosing Exposure Modes (focus on Av, A-DEP, and Close-Up (Flower Icon))
7.  NGA PhotoSnapper <----fun font="">

Tuesday, February 28, 2012

Exposure: Shutter Speed

What is Shutter Speed?

Shutter speed, also known as “exposure time”, stands for the length of time a camera shutter is open to expose light into the camera sensor. If the shutter speed is fast, it can help to freeze action completely, as seen in the above photo of the dolphin. If the shutter speed is slow, it can create an effect called “motion blur”, where moving objects appear blurred along the direction of the motion. This effect is used quite a bit in advertisements of cars and motorbikes, where a sense of speed and motion is communicated to the viewer by intentionally blurring the moving wheels.

How shutter speed is measured

Shutter speeds are typically measured in fractions of a second, when they are under a second. For example 1/4 means a quarter of a second, while 1/250 means one two-hundred-and-fiftieth of a second or four milliseconds. Most modern DSLRs can handle shutter speeds of up to 1/4000th of a second, while some can handle much higher speeds of 1/8000th of a second and faster. The longest shutter speed on most DSLRs is typically 30 seconds (without using external remote triggers).

Fast, slow and long shutter speeds

Fast shutter speed is typically whatever it takes to freeze action. For me, it is typically above 1/500th of a second for general photography and above 1/1000th of a second for bird photography.
Slow shutter speed is considered to be the slowest shutter speed that you can handle without introducing camera shake. 
How about long shutter speed? Long shutter speeds are typically above 1 second, when you have to use a tripod to get acceptably sharp images (for low-light/night photography or to capture movement).

How to set shutter speed (if you have a DSLR camera)

Most cameras handle shutter speeds automatically through in-camera metering. When the camera is set to “Auto” mode, both shutter speed and aperture are automatically selected by the camera. 
There are two ways to manually set the shutter speed:
a) By setting the camera to “Shutter Priority” mode, where you set the shutter speed and the camera automatically selects the aperture.
b) By setting the camera to “Manual” mode, where you set both shutter speed and aperture manually.
c.)  By setting the camera to "Bulb" or B mode.   This mode allows the user to hold in the shutter-release button  in and the shutter will remain open the entire time while the button is being held. 


How to set shutter speed (if you have a regular point & shoot camera)

Most cameras handle shutter speeds automatically through in-camera metering. When the camera is set to “Auto” mode, both shutter speed and aperture are automatically selected by the camera. 
However, we can "trick" the camera into providing us with a short or a long shutter speed.  It will be trial & error, so be prepared to take a lot of photos and check them to see if the moving object looks blurry.

 Most digital cameras have at least one setting that will provide a long shutter speed.   First, try setting your camera to "Landscape" mode (Mountain Icon) .  This will make moving objects look blurry in medium to dim light locations.   You can also try shooting in "Night" mode or "Night Portrait"  (You will probably have to turn OFF the flash)  You can also try "Fireworks," but this setting has a very long shutter speed and should be used in dark locations.


Click all of these links and take notes on what is important.  You'll be given a quiz on this later!


ShortCourses-- Click on ALL red animation buttons on the left side of page!!

Friday, February 24, 2012

Next Photo-Taking Assignment: Macro Mode


Regular Digital Cameras:  We will be using the FLOWER ICON on your digital cameras. This is Macro Mode. It is used for taking photos of things up close. It uses a larger aperture and so creates a more narrow depth of field. It is good for taking photos of flowers, thus the icon.


DSLR owners should use the A or Av function (Aperture-priority mode, which allows users to set the f-stop and the camera automatically adjusts the shutter speed based on the amount of light)


~~~~You will need to avoid CAMERA SHAKE.~~~~


Camera shake occurs OFTEN. It is especially bad when you take photos in low light. Click this link to learn how to avoid this dreaded problem! (one thing she doesn't mention here is that you can also lay your camera on a table, post, tree, ground, etc.and use the TIMER function to stabilize the camera)

You are strongly urged to take these photos outdoors in natural light. (DURING THE DAY!) This will give you the best lighting. If you are shooting indoors, please turn every light on and don't shoot at night.


You can click on this link to read more about
Macro Mode.

~~~


Your Assignment:
Explore the use of the Macro Mode to create narrow depth of field in your artwork.


Remember that Macro Mode will allow you to focus on things that are close, but things that are far away will be blurry. Blurry is good in this case, as long as EVERYTHING is not blurry.


Be creative and think about what you can photograph. Don't photography flowers. (There aren't many flowers this time of year anyway) Groups of similar objects work well. Remember to always think about the elements of art and the principles of design. 


DO NOT FORGET TO THINK ABOUT YOUR COMPOSITION RULES!!! Especially the Rule of Thirds, leading lines, and dramatic angles.   PS: Don't Center Stuff!


In your photos, things up close should be in focus and things further away will be slightly (to majorly) blurry.


You must take at least 50 photos.  Your 50 photos will be worth 50 points.


    Aperture Review


    Remember:

         Aperture refers to the size of the HOLE.

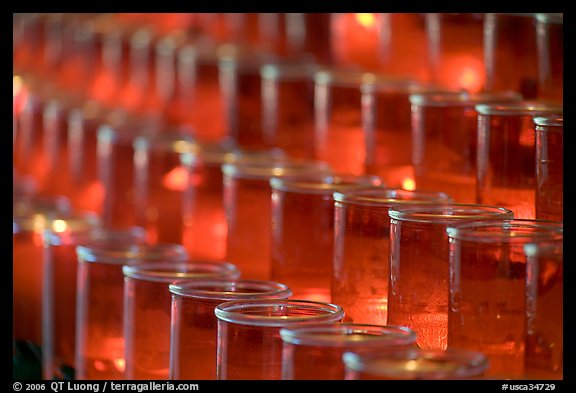
         A large aperture makes items close in focus...and things far away blurry.

    This was taken at f-3.2


         F-Stop refers to the f-number 
     
    This was taken at f-9
         A large F-Stop number will make things far away very clear and in focus
    .


          So, you have to check the question to see if it is asking about the f-stop number or the APERTURE.


       Today,

           1.  Fix the questions that you got wrong on the Aperture Worksheet from yesterday.

           2.  Go to http://www.nga.gov/kids/zone/photoop.htm   Try making a moving object blurry, while the background is in focus.  Try changing the aperture and shutter speed to make the photos look clear in the background, or blurry in the background.

           3.  Visit these links:
                Using Aperture and Shutter Speed Together   <---  Be sure to link on the red ANIMATION button(s)
                Understanding Exposure
         
            4.  Don't forget that MACRO MODE (50+) photos are due on Monday.  No Photos = Bookwork.